Paypal Invoice Template
A Paypal Invoice is an electronically created document that is used to request payment from an individual or company. It can be used to request payment for any product or service and can be customized to the needs of the individual issuing it.
Below are instructions for completing and issuing an invoice using Paypal.
Paypal Invoice Features
- Can add your company’s logo
- Gives you the option to send via Paypal or a share link
- Includes the option to charge for either products or services
- Allows for multiple people to be billed
- Automatically calculates the ‘Subtotal’ and ‘Total’ fields
- Has the option for partial payments and tips
How to Create and Send a Paypal Invoice
Step 1
Head to Paypal.com and log in with a valid Username and Password.
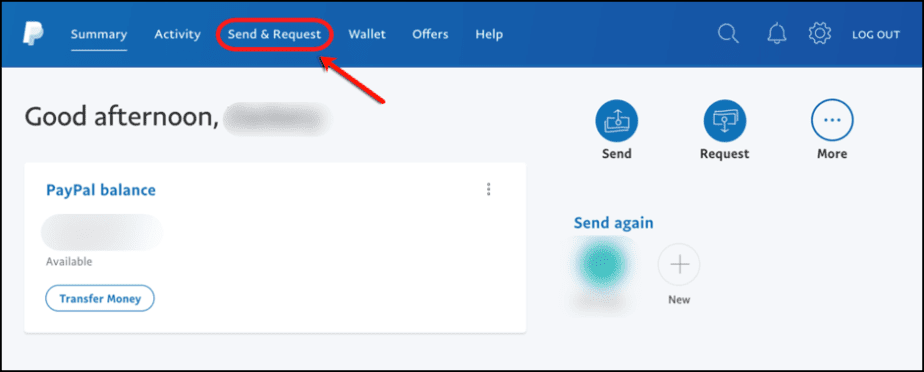
Step 2
Once logged in, select ‘Send & Request‘ at the top of the page.
 Step 3
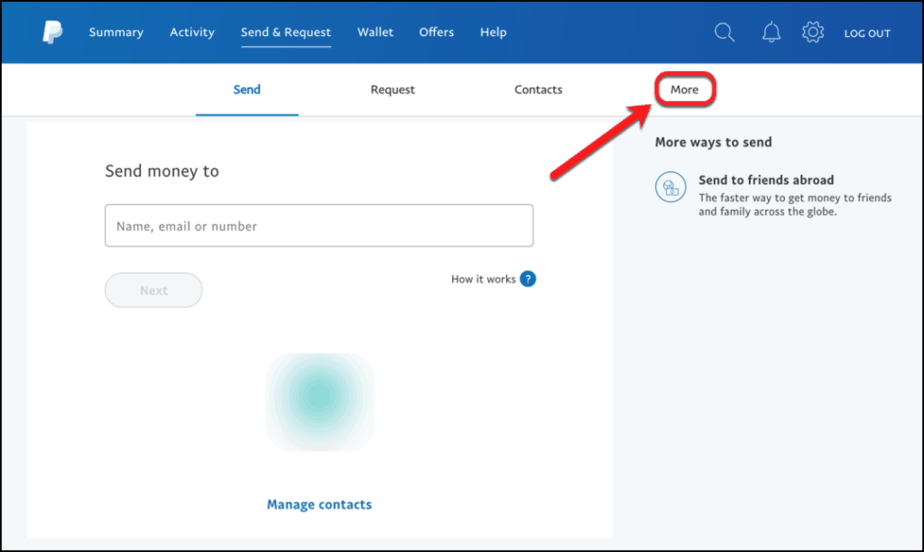
Click ‘More,’ which is located directly below the main top menu, next to ‘Contacts.’
 Step 4
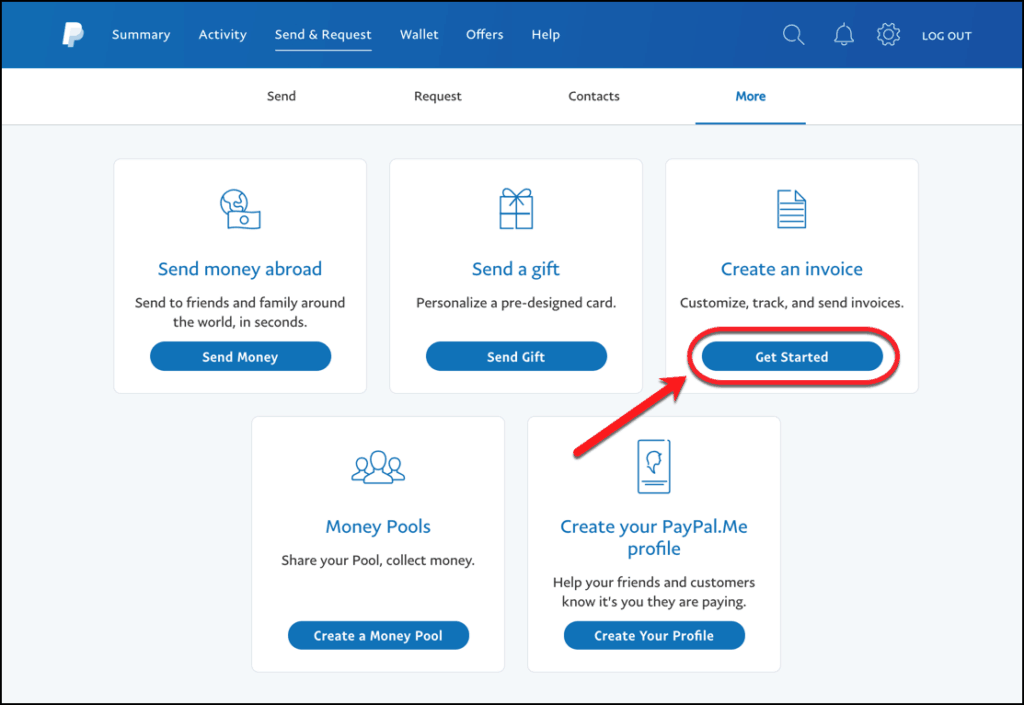
Click ‘Get Started‘ in the upper-right ‘Create an invoice’ box.
 Step 5
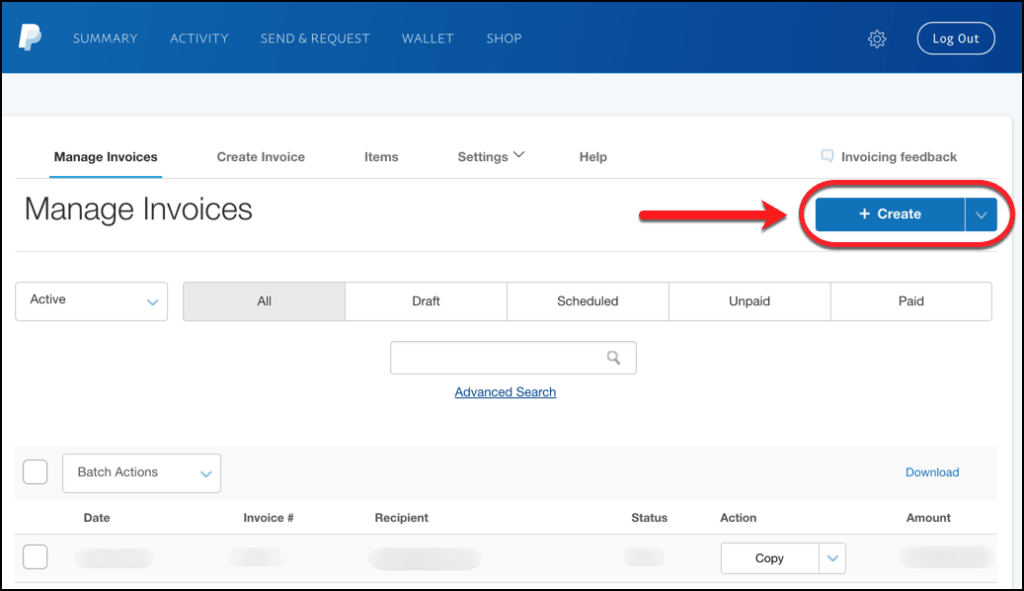
Select the ‘+ Create‘ button, which is located on the far right side of the page.
 Step 6
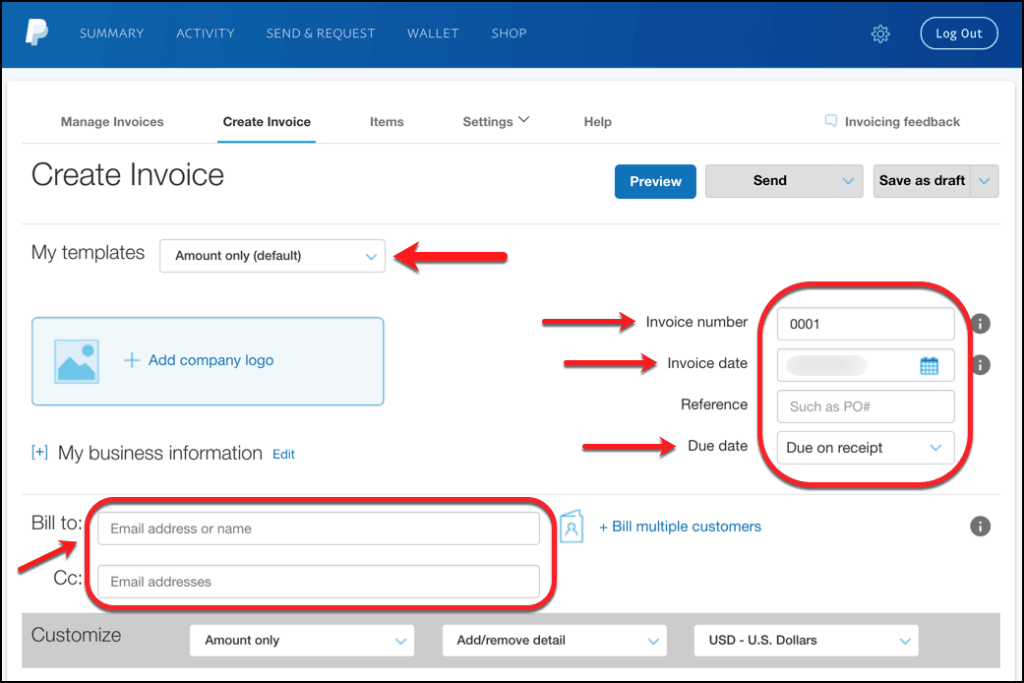
- If the issuer of the invoice will be charging products that were sold, select ‘Quantity‘ from the drop-down tab next to ‘My templates.’ If charging by an amount of time, select ‘Hours.’
- On the right-hand side of the screen, enter the Invoice Number, the Invoice Date, the Reference (if applicable), and the Date that the invoice will be due.
- Where it says ‘My business information,’ hit the ‘ + ‘ button to add any company contact info. To add or remove information, click the ‘Edit‘ text button.
- To bill multiple customers, click the ‘ + Bill multiple customers‘ button (lower-right in the image below).
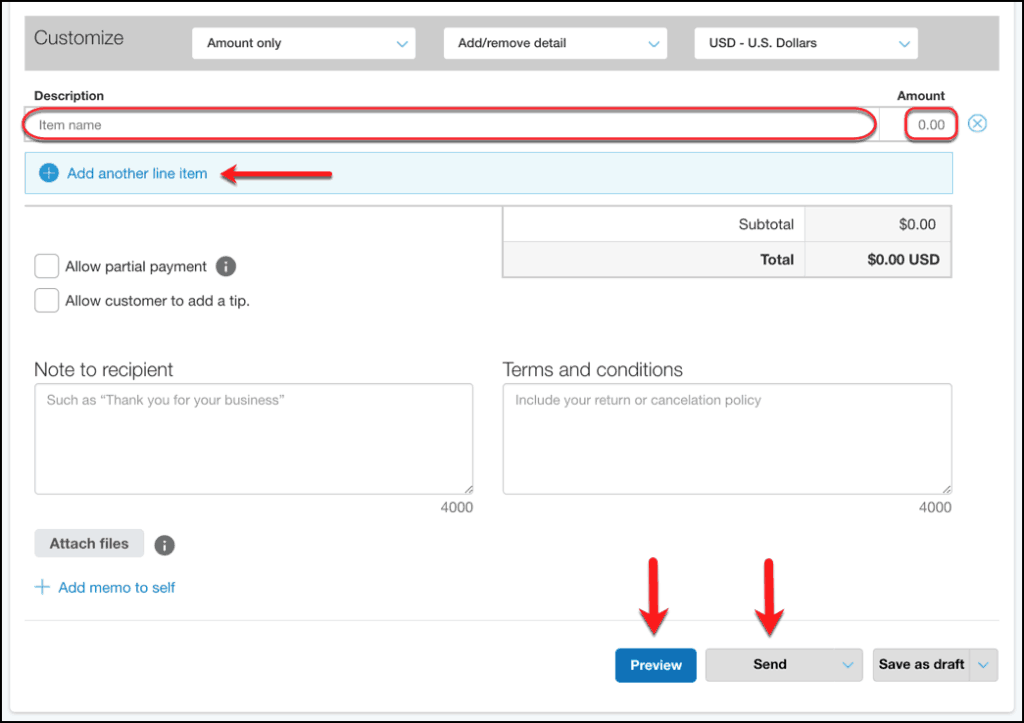
 Step 7
Scroll down to the lower half of the page to finish creating the invoice.
- Enter a brief Description of each expense followed by the dollar Amount to the right.
- For each additional expense, click the ‘Add another line item‘ button and repeat Step 1. The Total and Subtotal will automatically calculate.
- The two small checkboxes to the left of ‘Total’ give the sender the option to allow the client to make a Partial Payment as well as ad a Tip to the total amount.
- Enter any Notes to the customer as well as the Terms and Conditions to the invoice in the two text boxes at the bottom of the page.
- To examine the invoice before sending, click the blue ‘Preview‘ button. This provides a chance for the issuing company to ensure that there are no errors in the invoice.
- After ensuring the invoice is free of errors, select the grey ‘Send‘ button next to the ‘Preview‘ button. The Paypal Invoice has now been complete.