Construction Invoice Template


A construction invoice template is a form used for billing customers for labor and materials costs that resulted from building or renovating residential/commercial property. With the form, expenses can be broken down item-by-item, giving the customer a clear picture as to what was charged and why. The invoice is sent to the customer after work has been completed. Depending on the terms given, the client may be required to pay immediately, or after a set amount of time (such as 30 days). Custom terms can be added with all invoices provided.
Types (3)
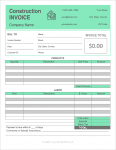 Version 1
Download: Adobe PDF, MS Word (.docx), MS Excel (.xlsx)
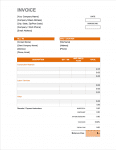 Version 2
Download: Adobe PDF, MS Word (.docx)
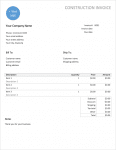 Version 3 (Word)
Download: MS Word (.docx)
What’s Included
- Areas to specify both the seller and buyer’s contact information,
- Tables for labor and product expenses,
- A field for specifying the invoice due date, and
- A comment box for special requests, notes, and payment details.
How to Write (Version 1)
Step 1 – Download
Download version 1 in Adobe PDF or MS Word (.docx).
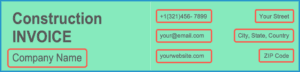
Step 2 – Company Information
Begin customizing the invoice to that of the issuing construction company. Enter the name of the company “ex: Phil’s Construction, LLC”, then enter the company phone (or your cell phone number), the company email, website, and mailing address.
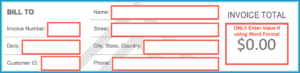
Step 3 – Client Contact Info
The “Bill to” section is for listing the information of the client. If any information isn’t available, it can be left blank. The following info can be entered here:
- Invoice number (ex: “10001”);
- Date (sent to client);
- Customer ID (if any);
- Client name (can be the name of the client’s company);
- Client address;
- Client city, state, ZIP, & country; and
- Client phone number.
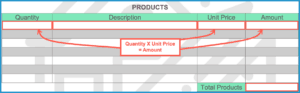
Step 4 – Materials / Products
In the products area, enter the number of items purchased for the job, a short description of what they are, their cost per item, and the total amount per item-type (quantity X unit price). Repeat this for all of the items that the client will be charged.
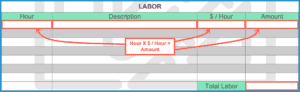
Step 5 – Labor
In the labor section, enter the number of hours worked for each task, a description of what the task involved (ex: “Removed drywall”), the hourly rate ($/hr) that the client will be charged for each task or job, followed by each task or day’s total cost (hours X rate).
Step 6 – Notes + Totals
Add up all the values in the “Amount” column for both the product and labor tables. Sum the totals for both tables and enter the result into the “Subtotal” field. Enter the sales tax into the appropriate field. Sum both the subtotal and the tax amount and put the resulting value into the “Total” field.
Enter any comments or payment instructions into the text box. If the contractor will be giving the client a certain number of days to pay, list this in the “payment is due within __ days” field.
